The HTC One is an amazing phone, the camera features that it offers (like Zoe) are exceptionally impressive however one thing I’ve found recently is that when it comes to backing the photo’s up from the phone, it’s a nightmare!
Until the recent 4.2.2 update of the HTC One there were 20 images stored every time you took a Zoe photo. This might not seem like an issue though so let me quickly tell you my story and how I learned to manage my photo’s better with the HTC One.
I have a 32GB HTC One and recently noticed that I was approaching that scary time when your phone warns you that you are running low on storage space so I decided it was time to take the images from my phone and stick them onto a HDD that I have for photos.
When I connected the phone to the computer and looked in Computer\HTC One\Internal storage\DCIM\100MEDIA there were over 3,00o files (a mixture of JPG and MP4). When looking through the files I was shocked that there were so many and how many of them belonged to ZOE and this led to my issues…
There was no way I wanted to spend time filtering through over 3,000 files, getting them into folders that matched the event where the images were taken or just into a random image folder so I looked at the phone a little closer and that’s when it struck me, the device has a way of sorting all of this for you. simply follow these steps and your photo management will become 10 x easier than before.
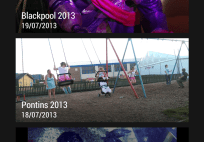
- Open the Gallery App and set the drop down to Events
- Press and hold on one of the folders to open the menu that shows Rename, Split To and Merge To (you will be using these three options a lot)
- Rename the albums to whatever you want and then start moving images around with the Merge To and Split To options
- Now that all the images are in the correct folders open your first folder and using the Zoe Share option at the top, create your chosen video
- When in video mode use Menu > Save once you have the video the exact way you want it
- Connect your phone via USB to your Computer and navigate to the “Pictures” folder (note we are no longer using DCIM)
- Inside the folder you will now see all your albums sorted for you to copy to your computer
- Once you have copied the images and videos to your device navigate to the “Video Highlights” folder to get your Zoe Shares that you saved earlier
I know that this all seems very obvious however for me it wasn’t so obvious. Admittedly it doesn’t reduce the number of images stored but it does make managing them a lot easier.


![[App] Lollipop Land; 5.0 easter egg released to play store as game](../../landofdroid.com/wp-content/uploads/2014/11/wpid-wp-1415372216626-resize-204-142.png)


